> For the complete documentation index, see [llms.txt](https://help.supplyd.co/llms.txt). Markdown versions of documentation pages are available by appending `.md` to page URLs; this page is available as [Markdown](https://help.supplyd.co/supplyd-hub/creating-your-supplyd-hub-account.md).
# Creating Your Supply'd Hub Account
Welcome to **Supply’d**.
Creating a Supply’d account gives you access to a powerful platform designed to simplify supplier, product, and purchasing management. Whether you are a retailer, wholesaler, or supplier, Supply’d helps you connect with trading partners, manage orders, track inventory, and streamline day-to-day operations in one central system. The setup process is quick and easy, allowing you to get started and begin managing your business more efficiently.
To create your account with Supply'd, you can use the link you were provided to register from the referring supplier or Supply'd sales rep.
If you have not been provided a referral link, but would like to register for a free Supply'd Hub account, visit . You will then be guided through a series of steps to create your account.
{% hint style="success" %}
If you already have a Supply’d account and would like to create an additional Supply’d Hub account, follow the guidelines in the [#creating-multiple-supplyd-accounts](#creating-multiple-supplyd-accounts "mention") section of the [#creating-your-account](#creating-your-account "mention") document.
{% endhint %}
* [#creating-your-account](#creating-your-account "mention")
* [#creating-multiple-supplyd-accounts](#creating-multiple-supplyd-accounts "mention")
* [#upgrading](#upgrading "mention")
***
## Creating Your Account
{% stepper %}
{% step %}
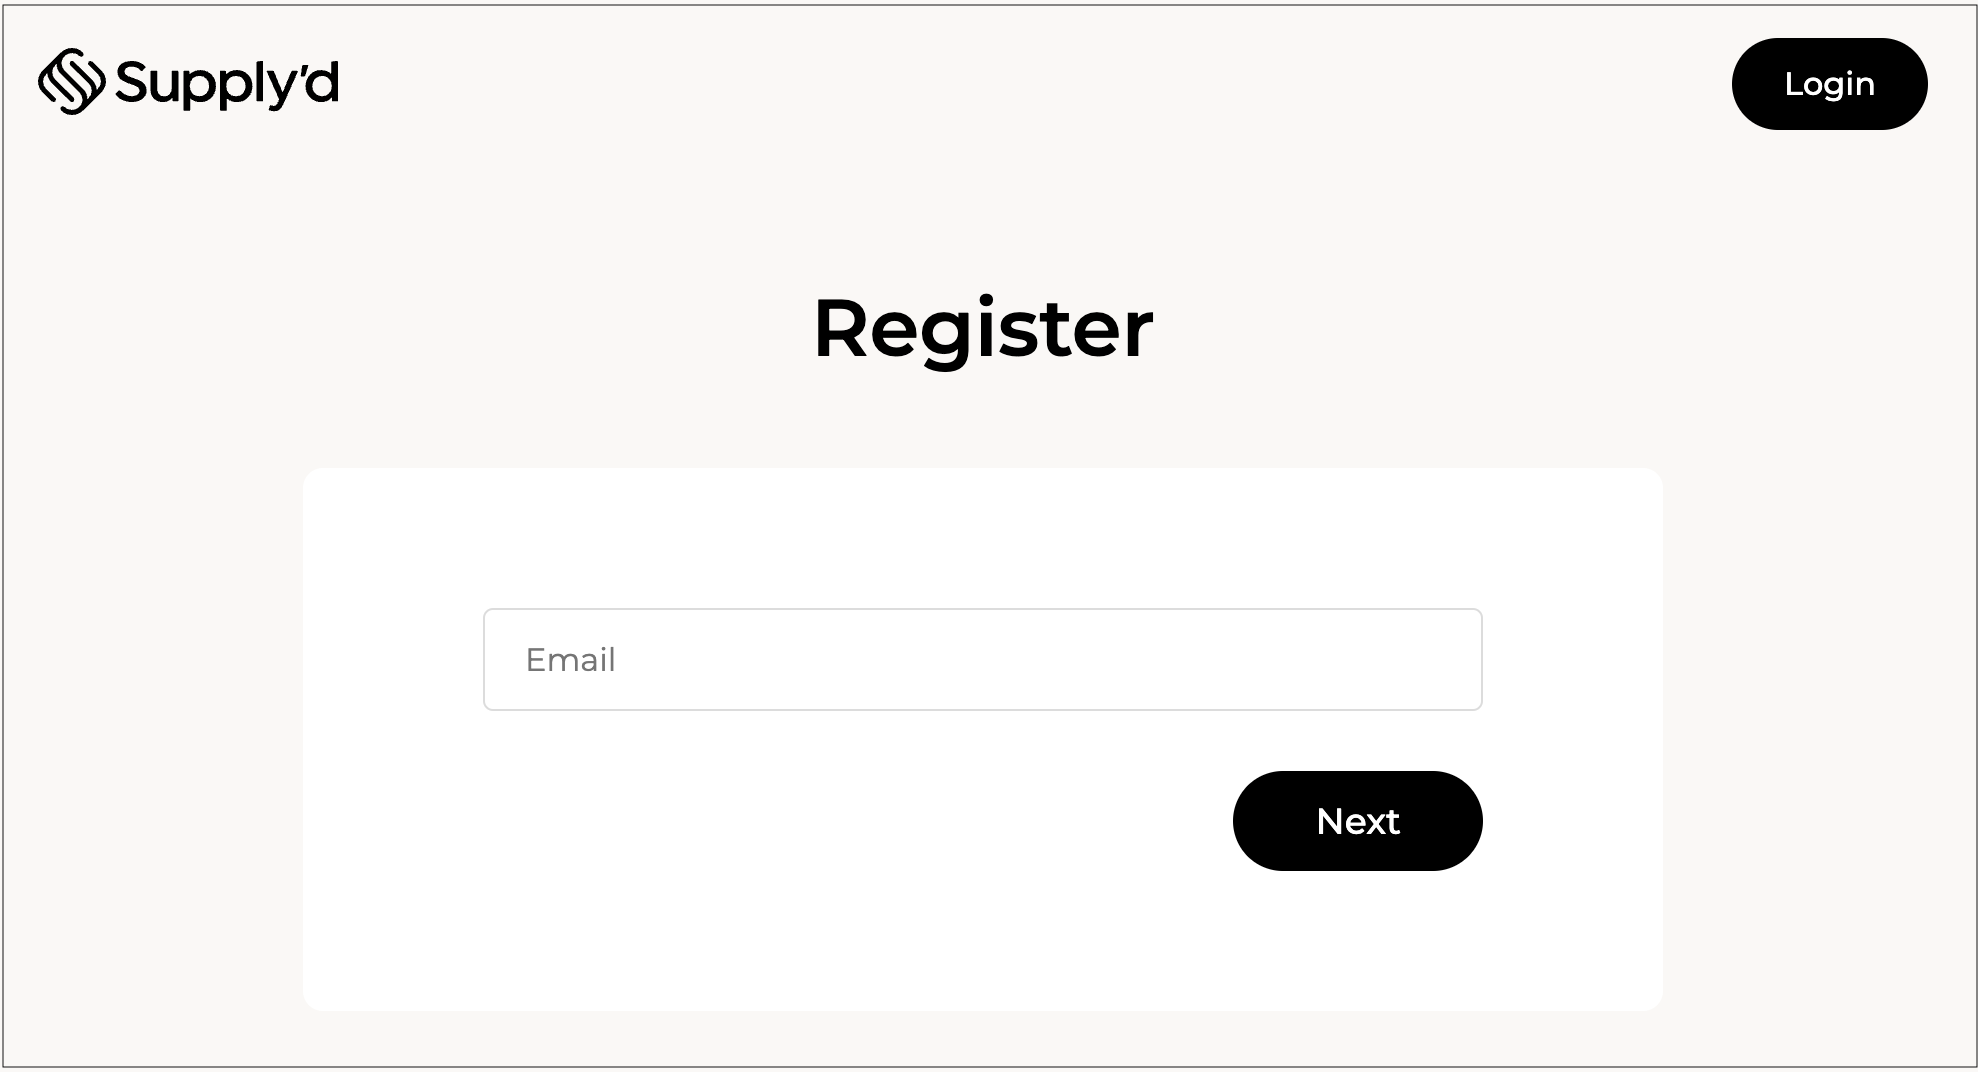
#### Enter Your Email
On the **Register** page, enter your email and click .
***
{% endstep %}
{% step %}
#### Enter Your Business Details
**Business Trading Name**
Enter the name your business trades as.
{% hint style="success" %}
The **Business Trading Name** is the name customers will see in Supply'd. For example if your legal business name was Unicorn Dreams Pty Ltd, but you trade as Unicorn Dreams, you would simply enter "Unicorn Dreams".
{% endhint %}
**Password**
Enter a password for you account.
**Country**
Select your **Country**.
Click .
***
{% endstep %}
{% step %}
#### Select the Account Type & Complete Your Business Details
**Product Type**
Select **Hub** as the Supply'd product you would like to register for.
{% hint style="info" %}
* **Lite:** Place purchase orders directly with your suppliers.
* **Hub:** Submit your products to retailers to be considered for ranging.
{% endhint %}
Enter your **Business Number** (eg. ABN), the **Street Address**, **Suburb**, select the **State**, enter the **Postcode** (entering your street address will display a list of matching addresses to choose from, and the suburb, state, and postcode will be filled in automatically), and, optionally, the business **Website**.
{% hint style="info" %}
**Business Number**
Commonly known as ABN or NZBN depending on the region. The number must be valid and active. Your legal company name will automatically be pulled from the business registration database.
The **Legal Company Name** will be pulled from the business register when you enter your **Business Number**.
{% endhint %}
Click .
***
{% endstep %}
{% step %}
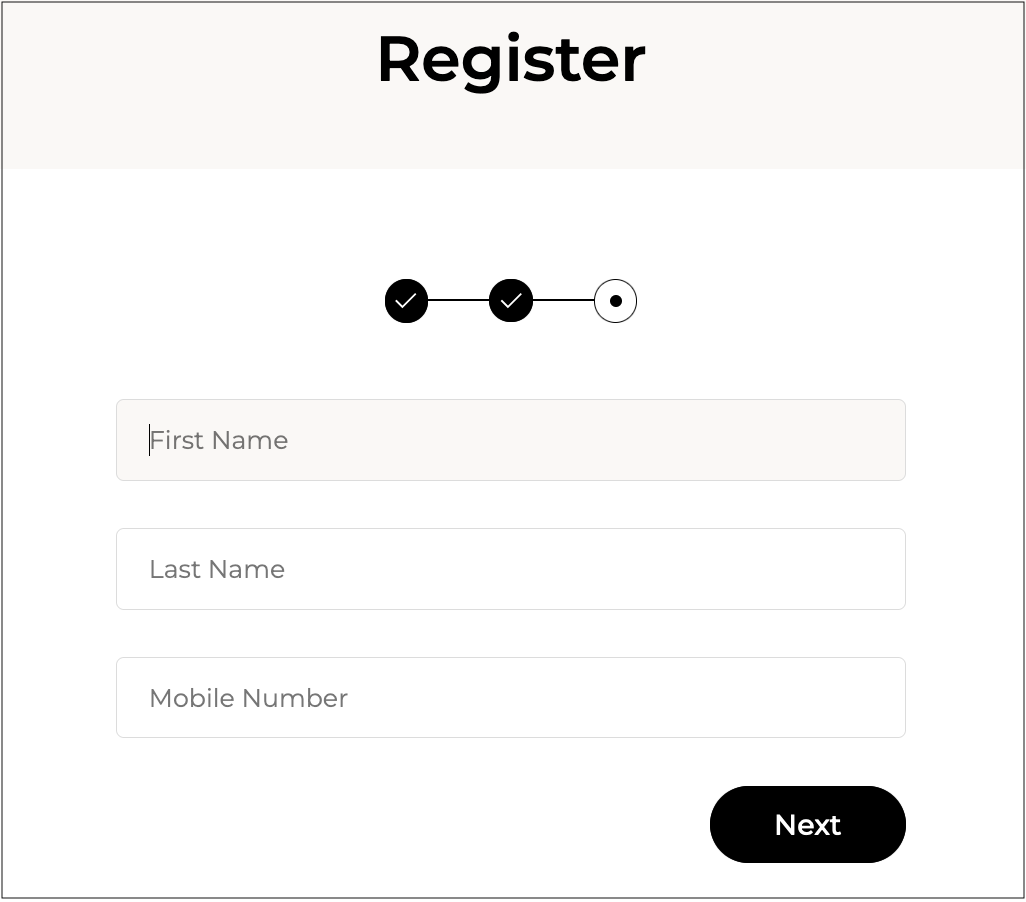
#### Enter Your Details
Enter your **First Name**, **Last Name**/surname and **Mobile Number**.
Click .
***
{% endstep %}
{% step %}
#### Enter the Code
You will be sent a code to verify your mobile phone number. Enter the code in the field shown. If you do not receive the code click **Resend Code**.
{% hint style="info" %}
You will also be required to verify your email address before being able to trade on Supply'd.
👉 See the [Broken mention](broken://pages/oN1194PBOKX5OAk20SMI) document for details on how to do this.
{% endhint %}
***
{% endstep %}
{% step %}
#### Complete the Set-Up

To **Complete Set-up,** click on **Complete Company Profile**.
***
#### Company Details
**Trading Name\* \[required field]**
This will be automatically filled from the registration details.
**Company Logo**
Upload your company logo. It is recommended to use a PNG image with a transparent background. Square images work best if available at least 500px wide. Wider images can be used as well. JPG images are also accepted.
**Business Number\* \[required field]**
This will be automatically filled from the registration details.
**Company Legal Name\* \[required field]**
This is automatically pulled from the business registration database after entering your business number and cannot be edited.
***
#### Company Profile


**Support Email\* \[required field]**
Add the email address suppliers can use to contact you in case of an issue or enquiry. This is not publicly available until an order or connection has been made.

**Support Phone\* \[required field]**
Enter the phone number suppliers can use to contact you in case of an issue or enquiry. This is not publicly available until an order or connection has been made.

**Your Website**
Add your website address. If you don't have a website please use a Facebook or Instagram URL.

**Business Categories**
This shows what type of business you are. Select the category or categories that best match your business.
For example, if you are a bakery who also has a cafe, you would select "Cafe" and "Bakery/Patisserie".

**Description**
Add a description of your business to be displayed on your profile.

***
#### Company Setting
**Timezone\* \[required field]**
Select the time zone your business mainly operates in. This will be the default time zone for all new users you add to Supply’d.
**Week Starts On**
Select the first day of the week according to your business.
{% hint style="info" %}
This is mainly used in the full version of Supply’d. It helps the system work out the due date when a customer has payment terms like 5 days end of week.
{% endhint %}
**Date Format**
Choose how dates are displayed in Supply’d to match your regional or company preferences.
**Liquor Licence**
To order products that require a liquor licence, you must upload your licence here. Accepted file formats are PDF, JPG, or PNG.
***
#### Operating Days
Select the days your business operates.
Click to apply your settings.
{% endstep %}
{% endstepper %}
***
**Welcome to Supply'd Hub!**
You are now ready to start [Adding Products (Supply'd Hub)](/supplyd-hub/products/adding-products-supplyd-hub.md) to your account.

***
## Creating Multiple Supply'd Accounts
Supply’d supports using one login across multiple accounts, making it easy to manage multiple sites, brands, or entities independently. Multiple accounts in Supply’d allow businesses to manage separate locations, teams, or operations within a single system while maintaining clear control and visibility across each account. For example, a business may run its production facility under one account while individual branches operate under separate accounts, keeping operations distinct while still connected through a single login. This setup improves organisation, streamlines workflows, and ensures data remains structured without mixing activities between entities.
{% hint style="warning" %}
Users on a LITE or HUB plan can only create additional accounts of the same type, while paid accounts can create accounts of any type.
Only users with access to Settings and Users permissions can create additional accounts.
{% endhint %}
* [#creating-a-additional-account](#creating-a-additional-account "mention")
* [#switching-between-accounts](#switching-between-accounts "mention")
* [#logging-in](#logging-in "mention")
***
### Creating an Additional Account
{% stepper %}
{% step %}
#### Go to Account Settings
Log in to your account. Click on your name in the top right and select **My Account**.
The **Account Settings** page will open.
***
{% endstep %}
{% step %}
#### Select Register New Account
Click on the 3 dots in the top right and select **Register New Account**.
The **Register** form will open.
***
{% endstep %}
{% step %}
#### Complete the Form
* **Email Address:** Your email address will be automatically added.
* **Business trading Name:** Enter the business name you trade under, eg. Tim’s Cookies. Please do not enter your legal business name here; that will be added in the next step.
* **Country:** Select the country your business is based in. If your country is not listed, it is not currently supported by Supply’d.
***
{% endstep %}
{% step %}
#### Add Your Details
**Product Type**
Select the type of account you would like to register:
* **Lite:** A free streamlined version designed for simpler operations. It provides the essential tools needed to manage purchasing without the full complexity of advanced production or ERP features.
* **Hub:** A free platform within Supply’d where suppliers can showcase and range their products with retailers. Suppliers can list their products, connect with current and potential customers, and present their range to businesses such as grocery stores and supermarkets for ranging consideration.
* **ERP:** The most advanced account type, built for end-to-end operational management. It supports full production control, inventory tracking, costing, and integrated business processes, giving a complete overview of operations from planning through to output.
{% hint style="warning" %}
Users on a LITE or HUB plan can only create additional accounts of the same type, while paid accounts can create accounts of any type.
Only users with access to Settings and Users permissions can create additional accounts.
{% endhint %}
Enter your **Business Number** (eg. ABN), the **Street Address**, **Suburb**, select the **State**, enter the **Postcode** (entering your street address will display a list of matching addresses to choose from, and the suburb, state, and postcode will be filled in automatically), and, optionally, the business **Website**.

{% hint style="success" %}
The **Legal Company Name** will be pulled from the business register when you enter your **Business Number**.
{% endhint %}

Click .
Your new account will open.
***
{% endstep %}
{% step %}
#### Complete the Set-up
Complete the set-up following the instructions for [Broken mention](broken://pages/VWvZFJ9U4QlqcmqpWOnZ).
{% hint style="success" %}
Your [Account Settings](/supplyd-erp/settings/account-settings.md) can be managed in the same way as the original account. Each new account functions as a completely separate account.
If you would like to give existing [Users](/supplyd-erp/settings/users.md) access to the new account, simply add them using their name and email address. The system will automatically recognise existing users, handle the linking process, and send an email invitation for them to accept access to the new account.
You can also create additional accounts directly from the new account.
{% endhint %}
{% endstep %}
{% endstepper %}
***
### Switching Between Accounts
Once the new account has been created, you can easily switch between accounts.
{% stepper %}
{% step %}
Click on your name in the top right and select **Switch Account**.
{% endstep %}
{% step %}
Select the account you would like to switch to.
{% hint style="success" %}
You can also add a new account from this page. Click on the 3 dots in the top right and select **Register New Account**.
{% endhint %}
{% endstep %}
{% step %}
Click .
{% endstep %}
{% endstepper %}
***
### Logging In
When you have multiple accounts, you’ll be presented with a list of accounts upon login, allowing you to select which account you would like to access.
Simply select the account you would like to log in to and click .
{% hint style="info" %}
When logging in:
* If a user does not belong to any of the companies, they will see an error page.
* If the user belongs to one company only, they will be taken directly into that account.
* If the user belongs to multiple companies, they will see a list of accounts (as above) to choose from when logging in.
{% endhint %}
***
## Upgrading
Want to upgrade to the full Supply’d experience or see what it can do for your business? Contact us anytime or complete the demo request form from your Supply’d Hub account:
{% stepper %}
{% step %}
On the **Home** page, click on the **Upgrade** tab.
{% endstep %}
{% step %}
Click on and the **Supply'd Demo Request** form will open.
{% endstep %}
{% step %}
Complete your details and click . You will receive an email with a link to book a time for a Supply’d representative to show you how Supply’d can help your business thrive.
{% endstep %}
{% endstepper %}
---
# Agent Instructions
This documentation is published with GitBook. GitBook is the documentation platform designed so that both humans and AI agents can read, navigate, and reason over technical content effectively. Learn more at gitbook.com.
## Querying This Documentation
If you need additional information that is not directly available in this page, you can query the documentation dynamically by asking a question.
Perform an HTTP GET request on the current page URL with the `ask` query parameter:
```
GET https://help.supplyd.co/supplyd-hub/creating-your-supplyd-hub-account.md?ask=
```
The question should be specific, self-contained, and written in natural language.
The response will contain a direct answer to the question and relevant excerpts and sources from the documentation.
Use this mechanism when the answer is not explicitly present in the current page, you need clarification or additional context, or you want to retrieve related documentation sections.