> For the complete documentation index, see [llms.txt](https://help.supplyd.co/llms.txt). Markdown versions of documentation pages are available by appending `.md` to page URLs; this page is available as [Markdown](https://help.supplyd.co/supplyd-erp/settings/delivery-settings.md).
# Delivery Settings
In **Delivery Settings** you can set proof of delivery methods and details for delivery optimisation. Under the **Vehicles** tab delivery vehicle details, capacities and running costs can be entered, as well as any required driver breaks.
This document will guide you through:
* [#enabling-the-delivery-module](#enabling-the-delivery-module "mention")
* [#managing-delivery-settings](#managing-delivery-settings "mention")
* [#the-vehicles-tab](#the-vehicles-tab "mention")
* [#adding-a-vehicle](#adding-a-vehicle "mention")
* [#editing-a-vehicle](#editing-a-vehicle "mention")
* [#removing-a-vehicle](#removing-a-vehicle "mention")
***
## Enabling the Delivery Module
To use the **Delivery** module, you will first need to enable it under your **Plan**. To do this, click on your name in the top right-hand corner and select **Billing**.
In the **Billing** settings, click on the **Plan** tab.

Toggle the **Delivery Module** on.

You are now ready to apply your **Delivery Settings**.
***
## Managing Delivery Settings
{% stepper %}
{% step %}
#### Go to Settings
Click on your company name in the top right and select **Settings**.
***
{% endstep %}
{% step %}
#### Select Delivery Settings
Scroll down and select **Delivery Settings** from the **Settings** menu.

The **Delivery Settings** page will open, showing your current preferences.
***
{% endstep %}
{% step %}
#### Select Edit Settings
Click on the 3 dots in the top right and select **Edit settings**.
The **Delivery Settings** form will open.
{% hint style="success" %}
To open or close the sections on this form click the little arrows to the right of the titles (as circled in red above).
{% endhint %}
Complete the sections as per the guidelines below:
***
{% endstep %}
{% step %}
### Delivery Settings
Default settings for deliveries.
**Proof of Delivery Methods**
The methods you would like to track for proof of delivery. Untick all options to not track POD (Proof of Delivery). Options are:
* **Name**
* **Signature**
* **Photo**
**Preferred Directions App**
Select the preferred maps app to use for directions.
* **Google Maps**
* **Waze**
* **Apple Maps**
**Show Guided Delivery To**
Select who can see the guided delivery steps. The guided delivery steps show on a delivery run and guide the user through the delivery steps (eg. Get directions, Add POD etc). It can be shown only to the allocated driver, or you can make it visible to all users with delivery access.
* **Allocated Driver Only**
* **All Users**
**Delivery Window\* \[required field]**
Enter the length of the delivery window in hours to be provided in automatic emails and SMS. The delivery will be skewed to allow more time for lateness and rounded to the nearest half an hour window. The minimum allowed time is one hour.
***
{% endstep %}
{% step %}
### Optimisation Settings

**Max Execution Time\* \[required field]**
Enter the maximum time that the optimiser is allowed to run in minutes. The longer the optimiser is allowed to run, the better optimised the route will be. The maximum is 30 minutes.
**Search Mode\* \[required field]**
Select the search mode to use when optimising the route.
* **Consume All Available Time:** Find the best possible route for the delivery based on the set **Max Execution Time**.
* **Fastest:** Stop the search after finding the first good solution.
**Use Avg Stoppage Times**
Select whether or not to use average stoppage times for each location. This provides more accurate stoppage times for each delivery. It applies only to orders with a customer assigned and where historical delivery stoppage data is available; otherwise, it will fall back to the default stoppage time.
**Default Stoppage Time (minutes)\* \[required field]**
Enter the default time in minutes spent at each destination when delivering orders.
**Consider Road Traffic\* \[required field]**
Select whether or not to consider usual traffic within the optimisation.
***
{% endstep %}
{% step %}
### Delivery Defaults

**Delivery Start Day/Time**
Select the start day (up to +7 days) and time for deliveries.
**Maximum Delivery Time (hours)**
Enter the maximum delivery time for each delivery run.
**Location**
Select the location this vehicle is used at.
**Vehicle(s)**
Select one or more vehicles for this delivery run.
{% hint style="info" %}
The vehicle will first need to be set up under the **Vehicle** tab as per the instructions below in [#adding-a-vehicle](#adding-a-vehicle "mention") before it will show in the drop-down selection.
{% endhint %}
**Allocate Orders**
Select how would you like to allocate orders to this delivery run.
* **Auto-assign:** Have orders automatically assigned based on your chosen criteria.
* **Manually:** Manually assign orders to the delivery run after it has been created.
**Order Selection**
Select how would you like to allocate orders to this delivery run.
* **Picked Orders:** Assign all orders that have been picked but not yet delivered.
* **Unfulfilled Orders:** Assign all orders that have not yet fulfilled.
**Include Shipping Zones**
If filtering a selection of shipping zones, select whether you would like to include or exclude them.
* **Include:** Include the list of shipping zones related orders.
* **Exclude:** Exclude the list of shipping zones related orders.
{% hint style="success" %}
For more information on shipping zones and rules and how to create them, see the [Shipping Settings](/supplyd-erp/settings/shipping-settings.md) document.
{% endhint %}
**Shipping Zones**
Select the shipping zones to include or exclude orders allocated to those zones from the delivery run.
Leave this field blank to include all shipping zones.
**Include Shipping Rules**
If filtering a selection of shipping rules, select whether you would like to include or exclude them.
* **Include:** Include the list of shipping rules related orders.
* **Exclude:** Exclude the list of shipping rules related orders.
**Shipping Rules**
Select the shipping rules to include or exclude orders allocated to those zones from the delivery run.
Leave this field blank to include all shipping rules.
**Order Limit**
Set a limit for the number of orders automatically allocated to a delivery, up to a maximum of 2,000.
**Default Order Export Fields**
Choose the default fields to include when exporting orders. To remove a selection, click on the cross beside the name of the field.
***
{% endstep %}
{% step %}
#### Save
Click to apply your settings.
{% hint style="success" %}
Now that these settings are applied you can create and optimise your deliveries.
{% endhint %}
{% endstep %}
{% endstepper %}
***
## The Vehicles Tab
Under this tab you will see a list of any delivery vehicles you have added. This is where you can manage your fleet of vehicles.
{% hint style="success" %}
The list can be rearranged by clicking on the 3 lines on the right of the name and dragging it to the desired position.
{% endhint %}
***
## Adding a Vehicle
{% stepper %}
{% step %}
#### Click Add+
To add a new vehicle, with the **Vehicles** tab open on the **Delivery Settings** page, click **Add +** in the top right.
The **Add Delivery Vehicle** form will open.
{% hint style="success" %}
To open or close the sections on this form click the little arrows to the right of the titles (as circled in red above).
{% endhint %}
Complete the sections as per guidelines below:
***
{% endstep %}
{% step %}
### Vehicle Details

**Name\* \[required field]**
Enter a name for this vehicle.
**Location\* \[required field]**
Select the location this vehicle is used at.
**Registration Number**
Enter an optional registration, or licence plate, number for this vehicle.
**Cargo Dimensions (m)**
Enter the internal cargo dimensions for this vehicle in metres. This is used to calculate the vehicle's capacity.
**Cooling Type**
Select the type of cooling that will be applied to the cargo hold.
{% hint style="warning" %}
When completing a delivery run for orders that include cartons, a “vehicle temperature” field will be required. If you attempt to scan a carton without entering this temperature, an error will appear prompting you to fill it in first.
{% endhint %}
***
{% endstep %}
{% step %}
### Vehicle Settings

**Capacity (m****2****)**
The cargo capacity in metres squared. Enter the vehicles cargo dimensions in the **Vehicle Details** above to automatically calculate this value.
**Max Weight (kg)**
Add the maximum weight of the cargo that vehicle can carry in kilograms.
**Cost Per Hour**
Enter the cost per hour for this vehicle to apply for optimisation. The cost per hour vs kilometre will be used to find the most cost efficient route.
**Cost Per Km**
Enter the cost per kilometre for this vehicle to apply for optimisation. The cost per hour vs kilometre will be used to find the most cost efficient route.
**Travel Multiplier**
Enter a multiplier to be applied to this vehicles travel time. For example, entering "2" means the vehicle is slower and its travel time is twice that off a normal vehicle. Use "1" for a standard travel time.
**Default Driver**
Select the driver that normally drives this vehicle.
**Route Restrictions**
Tick all options you would like to apply to delivery routes for this vehicle:
* **Avoid Tolls**
* **Avoid Highways**
* **Avoid Ferries**
***
{% endstep %}
{% step %}
### Default Start Location
**Start Location**
Select the default starting location for this vehicle. Choose from your list of [Locations](/supplyd-erp/settings/locations.md), or select **Custom Address** to enter a new one manually.
When **Custom Address** is selected, extra fields will appear for you to enter the address details.
***
{% endstep %}
{% step %}
### Default End Location
**End Location**
Select the default end location for this vehicle. Choose from your list of [Locations](/supplyd-erp/settings/locations.md) or select **Custom Address** to enter a new one manually. As above in the **Start Location**, additional fields will appear for you to enter the address details.
***
{% endstep %}
{% step %}
### Driver Break Settings
Set breaks for delivery drivers. These breaks will automatically be added to delivery runs when routing.

To add a **Driver Break**, click . A form will open.
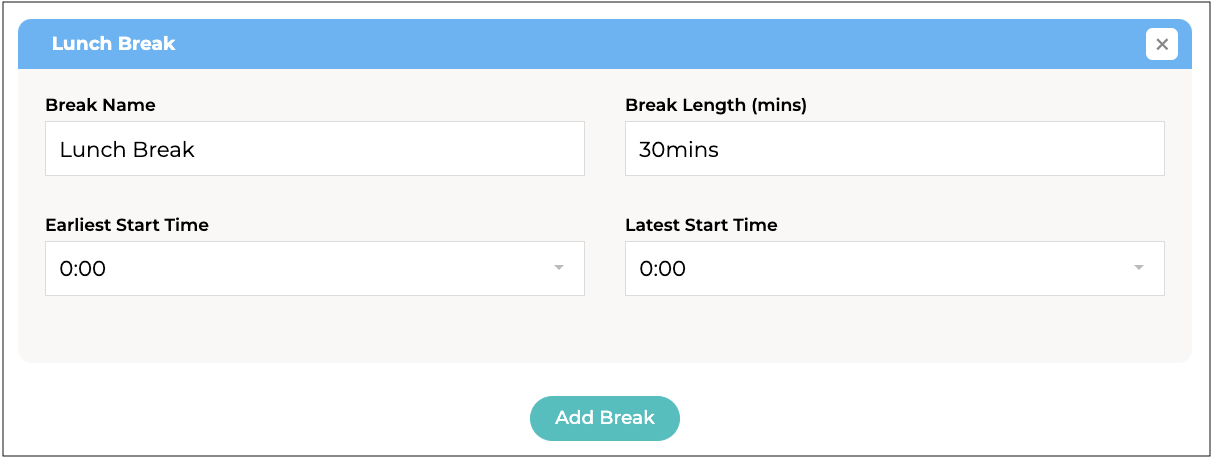
**Break Name**
A name for this break, eg. Lunch Break, Rest Stop etc.
**Break Length (mins)**
Enter the length of time for this break in minutes.
**Earliest Start Times**
Select the earliest start time for this break.
**Latest Start Time**
Select the latest start time for this break.
Repeat these steps to add any additional breaks.
***
{% endstep %}
{% step %}
#### Save
Click to add the vehicle and apply your settings.
The vehicle will appear on the list under the **Vehicles** tab.
{% endstep %}
{% endstepper %}
***
## Editing a Vehicle
To edit a vehicle's details:
{% stepper %}
{% step %}
Click on your company name in the top right and select **Settings**.
{% endstep %}
{% step %}
Scroll down and select **Delivery Settings** from the **Settings** menu.
{% endstep %}
{% step %}
Go to the **Vehicles** tab to see the list of delivery vehicles.
{% endstep %}
{% step %}
Click on the vehicle you would like to edit the details for. The **Edit Delivery Vehicle** form will open.
{% endstep %}
{% step %}
Change any details required following the guidelines above for [#adding-a-vehicle](#adding-a-vehicle "mention").
{% endstep %}
{% step %}
Click to apply your settings.
{% endstep %}
{% endstepper %}
***
## Removing a Vehicle
To remove a delivery vehicle:
{% stepper %}
{% step %}
Click on your company name in the top right and select **Settings**.
{% endstep %}
{% step %}
Scroll down and select **Delivery Settings** from the **Settings** menu.
{% endstep %}
{% step %}
Go to the **Vehicles** tab to see the list of delivery vehicles.
{% endstep %}
{% step %}
Click on the vehicle you would like to remove. The **Edit Delivery Vehicle** form will open.
{% endstep %}
{% step %}
Click on the 3 dots in to top right of the form and select **Remove**.
You will be asked to confirm.
Click .
{% endstep %}
{% endstepper %}
---
# Agent Instructions
This documentation is published with GitBook. GitBook is the documentation platform designed so that both humans and AI agents can read, navigate, and reason over technical content effectively. Learn more at gitbook.com.
## Querying This Documentation
If you need additional information that is not directly available in this page, you can query the documentation dynamically by asking a question.
Perform an HTTP GET request on the current page URL with the `ask` query parameter:
```
GET https://help.supplyd.co/supplyd-erp/settings/delivery-settings.md?ask=
```
The question should be specific, self-contained, and written in natural language.
The response will contain a direct answer to the question and relevant excerpts and sources from the documentation.
Use this mechanism when the answer is not explicitly present in the current page, you need clarification or additional context, or you want to retrieve related documentation sections.